Making your first plugin
In this guide we will cover:
- Setting up the development environment.
- Creating a plugin project.
- Writing a basic plugin.
Installing the .NET 5 SDK
Install the latest .NET 5 SDK from here (you should get a dotnet-sdk-xxxxx.exe).
Installing the IDE
After setting up the .NET Core SDK, you will need an IDE. The IDE provides you with the environment and tools for coding plugins.
Visual Studio Code (recommended)
You can use Visual Studio Code for developing OpenMod plugins. It supports Linux, macOS, and Windows. Visual Studio Code is the recommended solution for small to mid-sized projects.
Visual Studio
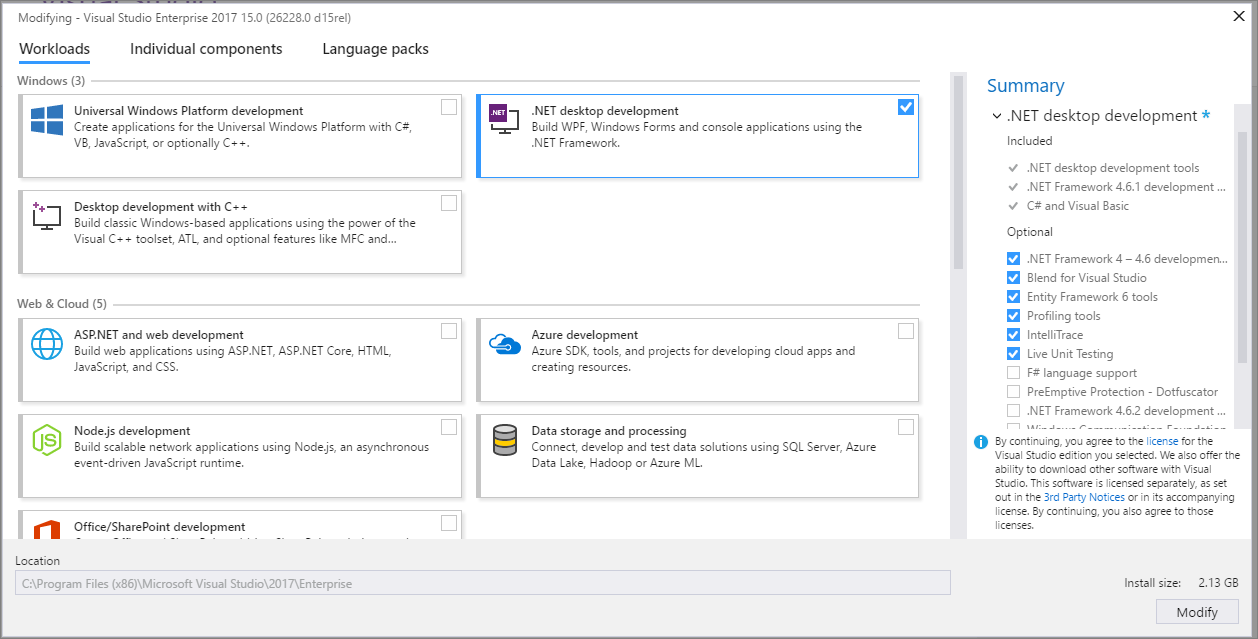
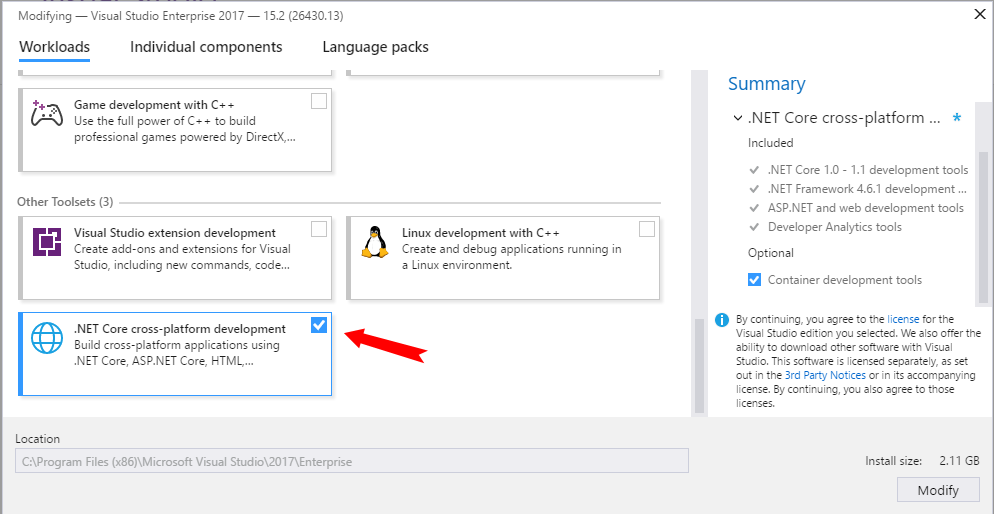
If you want a full IDE experience, download and install Visual Studio Community Edition. Visual Studio is only supported on the Windows platform. When the installer starts, select "Visual Studio 2019 Community Edition" (or newer, if available). After that select the ".NET Core cross-platform development" and the ".NET Desktop Development" options as shown below.


Rider
If you are using Linux and do not want to use Visual Studio Code, you can install Rider. Although it is a commercial product, it can be obtained for free when applying for a Jetbrains Student License. Like Visual Studio, it provides a full IDE experience and has similar capabilities.
Generating the Plugin Project
Start cmd or Powershell and navigate to the folder where you want to create the plugin project.
E.g. ([optional])
mkdir C:\Users\<Username>\source\repos\MyPlugin\
cd C:\Users\<Username>\source\repos\MyPlugin\
After that, install the OpenMod Plugin Templates for the .NET Core SDK:
dotnet new install OpenMod.Templates::*
Finally, you can generate the plugin project with this command:
dotnet new openmod-universal-plugin --PluginId <PluginId> [--FullPluginName <FullPluginName>]
or, if you want to develop a plugin for Unturned:
dotnet new openmod-unturned-plugin --PluginId <PluginId> [--FullPluginName <FullPluginName>]
PluginId must be a unique identifier for your plugin. By convention, it is the same as the NuGet package ID.
FullPluginName is optional and will set how your plugin should be displayed to the user.
To get the full help for the command, you can use the --help switch like this:
dotnet new openmod-universal-plugin --help
or, for Unturned:
dotnet new openmod-unturned-plugin --help
Example If you want to create an Unturned plugin project, you can use the following command:
dotnet new openmod-unturned-plugin --FullPluginName "My Unturned Plugin" --PluginId "MyName.MyUnturnedPlugin"
Adding a basic command
Now that you've set up your plugin, open the .cs file with the IDE you have installed earlier.
In this example we are creating an echo command. Create a new class (how you do this depends on your IDE). By convention command classes are prefixed with "Command" so call it CommandEcho. Since this will be an universal command that works on all platforms, we will make it inherit from Command. If this command would be only for Unturned, we would inherit from UnturnedCommand instead.
This is what your class should look like:
public class CommandEcho : Command
{
}
Let's go ahead and fix the error by implementing the method ExecuteAsync() and a constructor. For now, do not worry about what async is. This is going to be the method that executes what you want your command to perform.
So now, you will be wanting to know how you can access the in-game data and methods. You can access the command context without the parameters, by simply using Context (this comes from using the Command abstract class). This will allow you to access the Player, from now it is quite easy, let's see a finished product of this command.
[Command("echo")]
[CommandDescription("Echo a message")]
[CommandSyntax("<message>")]
public class CommandEcho : Command
{
    public CommandEcho(IServiceProvider serviceProvider) : base(serviceProvider)
    {

    }

    protected override async Task OnExecuteAsync()
    {
        // This gets us the text that the user wants to echo.
        string text = string.Join(" ", Context.Parameters);

        await Context.Actor.PrintMessageAsync(text);
    }
}
OnExecuteAsync is getting called by the command executor and provides you with the commands "context". At the top of the class, you will see we are setting our command metadata using attributes.
For more, visit the commands documentation.
Best Practices
Caution
Do not use static plugin instances, instead always pass instances by reference. OpenMod dynamically creates and destroys your plugin instances, which would result in wrong instances being used after reloads.
Here is a bad example:
public static MyPlugin Instance { get; set; }
public class MyCommand : Command
{
     public MyCommand(IServiceProvider serviceProvider) : base(serviceProvider)
     {
     }

     public async Task OnExecuteAsync()
     {
         MyPlugin.Instance.DoSomething();
     }
}
Use this instead:
public class MyCommand : Command
{
     private readonly MyPlugin m_MyPlugin;

     public MyCommand(
         MyPlugin myPlugin,
         IServiceProvider serviceProvider) : base(serviceProvider)
     {
         m_MyPlugin = myPlugin;
     }

     public async Task OnExecuteAsync()
     {
         m_MyPlugin.DoSomething();
     }
}
